Installation
Introduction
The Xchange Server software is supplied as an Internet download. It is a self-contained installer that contains the files needed to install a copy of Xchange Server. The installer also contains the drivers that are required to communicate with the telephone system.
The Xchange Server software does not contain the files needed for client installation. These should be downloaded or sourced separately.
The client software is licensed on a concurrent connection basis, and the license is entered on the server as part of the installation process. The license code can be retrieved automatically via the Internet by the server software. If no Internet connection is available, please have the license code available during the installation. Otherwise, the software will work for 30 days and then expire.
Before you start
Before you start, please check you have the following:
- A suitable PC to install the server on (please check minimum requirements)
- The IP address of the telephone system (please check for other requirements)
- Any license codes that have been provided
- If you are making a major or minor upgrade to an existing installation your server must be licensed for software assurance.
- Example of minor upgrade:2.3.2 to 2.4.0
- Example of major upgrade:2.4.0 to 3.0.1
NOTE:An iteration update (e.g. 2.3.1 to 2.3.2) does not require a software assurance license.
- ENSURE your installation serial number contains a 2.4 or later version license (If you haven't got this license type, please contact your Xchange sales contact)
- UPGRADE Xchange Server from version 2.3 to version 2.4 or later by running the 2.4 or later server set up program and following the instructions
- Refresh the license by clicking the 'Refresh licenses' button on the Licensing screen of the Xchange Server Configuration console
Xchange Server software setup
To install the Xchange Server software, double-click on the Xchange Server program. The installer package should launch and the installation will commence. The installation process may take between thirty seconds and ten minutes depending on the software that is already on your computer. If the computer has a brand new installation of Windows, then the setup disks will install a number of Microsoft components that take some time, please be patient while the software installs. It may even be necessary to reboot your computer during this process. Please follow any instructions given.
After the installation is complete, the configuration program will be run for the first time. You can run the configuration program again at a later time using the icon created in the Start menu.
NOTE:The Xchange Server software takes a minute or so to start on the first occasion that it is run. Please be patient during this process.
Xchange Server services
As part of the installation process, the Xchange Server service will be installed and started.
Xchange Server firewall ports
The Xchange clients and server communicate using TCP port 21050, 21051 (TLS secured port for client connections) and UDP port 21059. The server installation should configure the local firewall to allow support for these services. In the event that a non-standard firewall is used then these ports may need to be "allowed" manually.
Installation Wizard
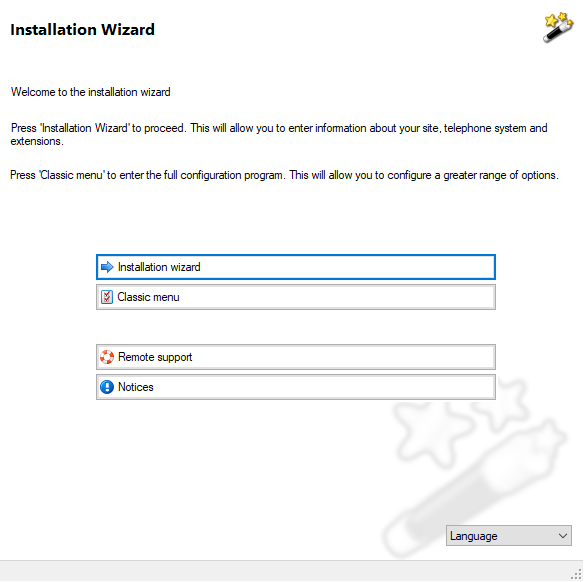
When running the Xchange Server Configuration program for the first time, it is recommended that you choose to run the installation wizard. In the wizard, you are presented with a series of pages that, when complete, will allow you to finalize the installation of the server components.
Press the 'Installation wizard' button to begin the installation wizard process by licensing the software.
Licensing
Licensing assistance

Click this button to view additional help with licensing.
Adding your first license
To license Xchange for the first time, you will have two options.

If your computer is connected to the internet, you can click the 'Register online' button to activate your license immediately.

If not, you'll need to click the 'Manual registration' option and follow the details shown onscreen.
Trial licensing

Xchange will run for 30 days if licensed for trial purposes. To do this, leave the 'Serial number' box empty, fill in the remaining information and then click the 'Register for trial' button.
First time Registration: Step-by-step
With Internet Connectivity on Server
- To register online you must have an active internet connection on the Xchange Server computer.
- Enter all of your registration details including your unique serial number carefully.
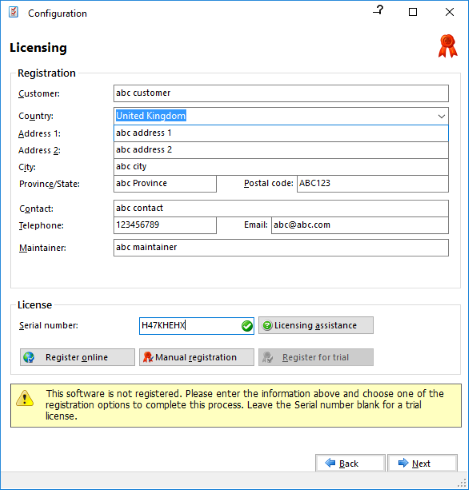
- Click 'Register online'.

- Mandatory fields must be completed.
If any are not completed a warning will appear and the applicable fields will be marked in red.
Please complete all required fields before proceeding.

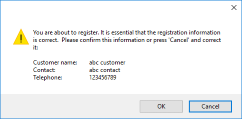
- You will be prompted to confirm that the registration details are correct.
- Once registration is complete, you will see a list of active licenses appear.
If this list is not correct please contact your software supplier.

Without Internet Connectivity on Server
- This method must be used where the site and server does not have an active internet connection. As part of the process you will be provided with a web address which will allow you to complete registration from a computer or other device with access to the Internet. Alternatively you can contact your offices who will be able to access the website to obtain the unlock codes that you will need.
- Enter all of your registration details including your unique serial number carefully.
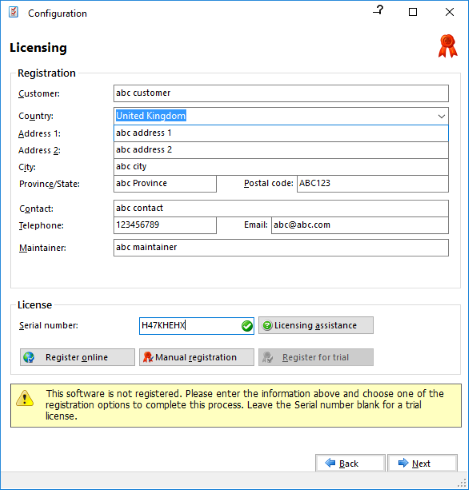
- Click 'Manual registration".

- The 'Registration' window will open.
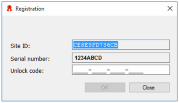
- Make a note of the Site ID and the Serial number as you will need these for the next steps.
- Once the manual registration has been completed, the website will provide one or more unlock codes to you along the lines of xxxx-xxxx-xxxx-xxxx. Please make a note of these. You just need to enter it/them into the 'Unlock code' box on the server and then click 'OK'. When there is more than one unlock key required, they must be entered one-by-one to correctly activate the license.
- Once all unlock codes have been entered and registration was successful you will see a list of active licenses appear.
If this list is not correct please contact your software supplier.

Site
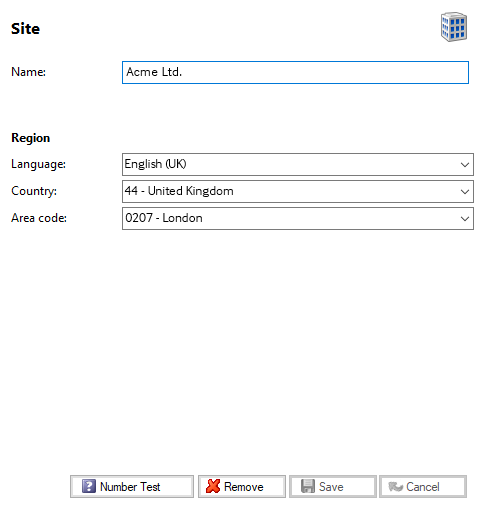
The next page asks you to enter information about your location. Please enter a 'Name' for your site, and then configure the 'Country' and 'Area code'. The countries and areas are listed in alphabetical order, for convenience. If you select a new country the area codes selection will change accordingly. The 'Country' and 'Area' code boxes allow you to set your regional information. This is used when Xchange Server interprets telephone calls to understand dialled numbers. If the "Use Windows settings (TAPI) for dialing rules" option is selected then the standard built in dialing rules will be overwritten with those available from within Windows. This option is not normally required and should only be selected if the built in dialing rules cannot be used to provide the required functionality. If it is selected then the system administrator must ensure the Windows dialing rules have been separately configured. A system reboot is normally required following configuration of Windows dialing rules.
Telephone System
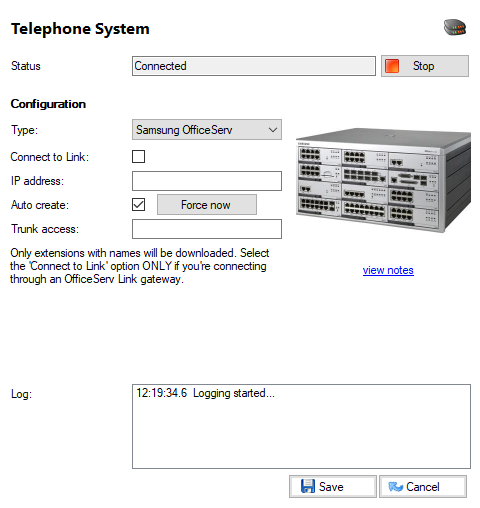
Here you need to enter information about your telephone system environment.
Enter the information and then press 'Save' and then 'Next' when done.
Telephone system settings:Telephony settings
Extensions
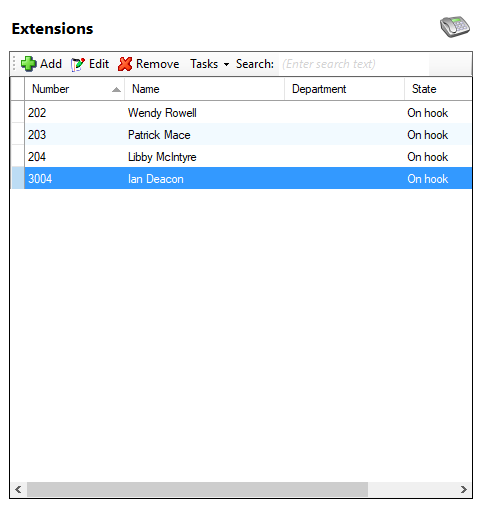
At this point, the software will attempt to connect to the telephone system and download a list of extensions. This process can take several seconds. After the extension list is downloaded, you may want to review it, and manually add or remove any extensions using the 'Add', 'Edit' and 'Remove' buttons provided. If after about 30 seconds the extension list hasn't started downloading, press the 'Back' button to review the telephone system settings. You might also look at the Log as any relevant error messages would be contained here. When you have finished reviewing the extensions press the 'Close' button. The installation wizard will end.

 Report this page