Services -> Federation
Federation allows 2 or more Xchange servers to communicate enabling a user to:
- Use their Xchange PC Client client to call and transfer calls between sites (assuming PBX dial plan supports inter-site dialing)
- And to monitor their colleagues' status/availability on the remote sites.
To enable federation each Xchange Server requires an additional Federation license. The maximum number of servers that can be federated is six (if anything larger is required please contact your Xchange provider).
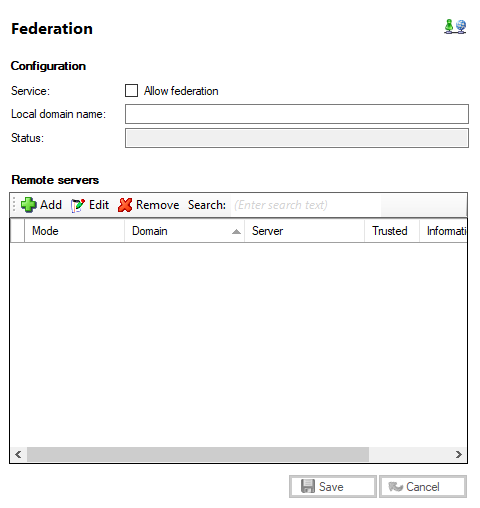
Allow federation

Tick this box to enable Federation Service.
Local domain name

Enter you Site name; this option is used for Instant Messaging across federated sites.
Status

Displays current federation status e.g. Offline/Ready.
Add button

To add a remote server manually, click this button.
Edit button

The remote servers that have already been created can be administered from this page by selecting them in the list and clicking the 'Edit' button.
Remove button

To delete a remote server, select it from the list and click on the 'Remove' button.
Search

To delete a remote server, select it from the list and click on the 'Remove' button.
Federation Setup Guide
Introduction
Federation allows 2 or more Xchange servers to communicate with each other providing users with the ability to call, chat and transfer the calls between the remote sites. It also allows the users to monitor their colleagues' status/availability on the remote sites. (Assuming PBX dial plan supports inter-site dialing) This guide will take you step by step through the installation process and show you how to set up federation between multiple sites.
Important Requirements
- 2 or more supported PBXs*2
- 2 or more Xchange Server licenses (including applicable client licenses)
- 2 or more Xchange Federation licenses
*2Maximum number of servers that can be federated is six (if anything larger please contact your Xchange provider).
Installation and Configuration
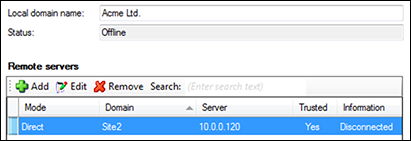
1.Assuming that the Xchange Server has been installed and licensed, launch the Xchange Server software and navigate to the Service tab. From the drop down list choose "Federation". You will be shown this window.
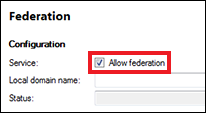
2.Tick the "Allow federation" box.
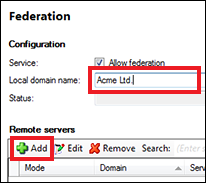
3.In the "Local domain name" box type in your site name. Click on "Add" (green cross).
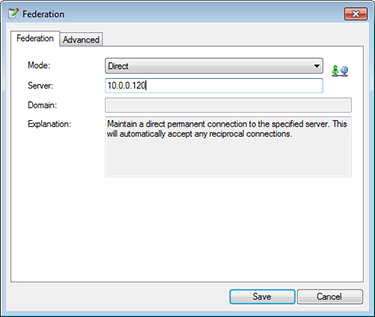
4.You will be prompted with this window. From the "Mode" drop down list choose "Direct" and type in the remote site's Server IP Address and click on "Save".
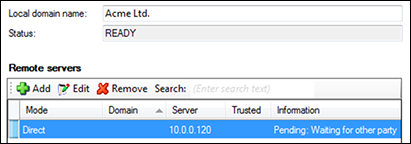
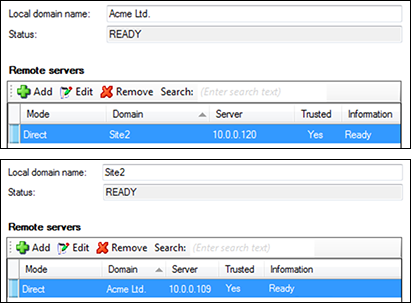
5.All connections between the sites will be shown on the Remote servers list. The information column will show the current state of any connection i.e. creating, pending or ready. Click "Save" to initiate the connection.
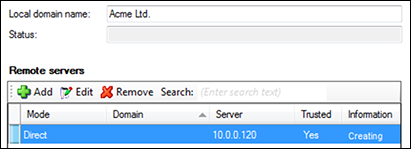
Acme Ltd. is awaiting Site2 to accept the invite.
Site2 is waiting to authorize connection with Acme Ltd. and accept the invitation.
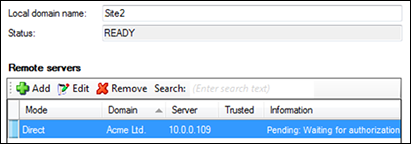
6.Once the connection is established and both sites are connected, the information column will change the state to Ready.
For all additional sites follow the same steps (1 through 4) but instead of creating a new connection as in step 4 you will wait for the connection to appear on the Remote servers list. When it appears, click on "Edit", you will then be prompted with this window option.
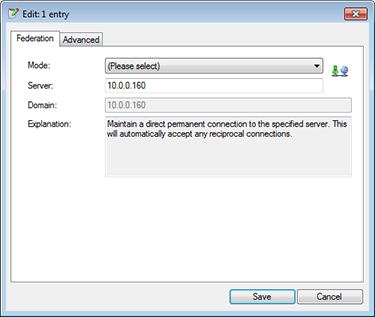
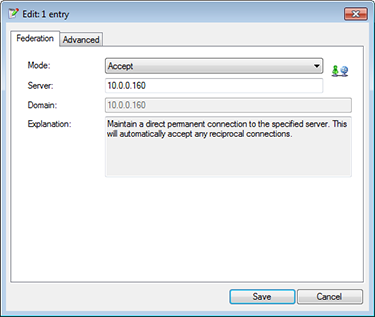
From the "Mode" drop down list choose "Accept", click on "Save" (remember to save the general setting in the Federation window as well), this should establish the connection with the remote site.
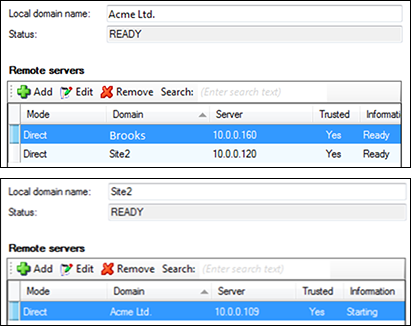
All the steps described above must be carried out at each federated site. If the federation setup has been successful, all of the remote sites will appear in the "Equipment" tab on the left hand site once you reload the server software.
If one of the remote sites needs to be relocated please make sure that the server is first disconnected from the rest of the federated sites. Make sure that the "Allow federation" box is unchecked and then save the settings (bottom right corner). The Information column should then display disconnected status.
Important Tips
1.Always remember to open the port 21050 on the router to allow servers to see each other.
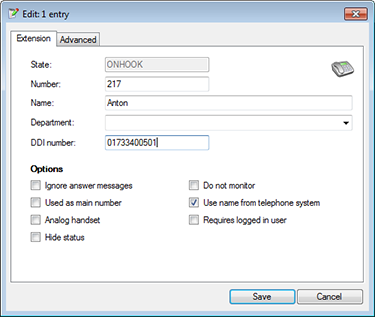
2.Configure extensions in the following way if the two linked PBXs do not have full networking support and do not allow calls between them using internal numbers. In the "Extensions" tab, click edit on an extension and enter its (fully qualified) DID number such as 01234567890 or +441234567890 when sites are in multiple countries. Repeat this for each extension on both sites. This will allow the server to treat extensions as internal while dialing the correct number to allow calls between the two or more PBXs.

 Report this page